

Hello Everyone !
In my last article, we decompiled a mobile application. Then we recompile a class that was re-modified in smali format and post a Log message. Now we will learn how to bypass apps root detection in Android.
So why? We need rooted devices to test or analyze Android apps more efficiently. However, applications with root detection mechanism prevent them from opening on rooted devices. In this article, we will learn how to bypass the root detection mechanism over two different techniques.
You can download the sample application from the link below.
https://apkpure.com/tr/rootbeer-sample/com.scottyab.rootbeer.sample
com.scottyab.rootbeer.sample
The device installed on Genymotion comes with root. But you cannot use real devices as default root privilege. For the possibility of unconscious use of this authority, phones are not given root privilege.
Rootbeer is a 3rd party library that checks if the device has root detection and the apk we downloaded is a test application.
Rootbeer detects applications in the rooted device that contain threats for it. It also checks whether the device is rooted by analyzing whether some directories on rooted devices exist or not.
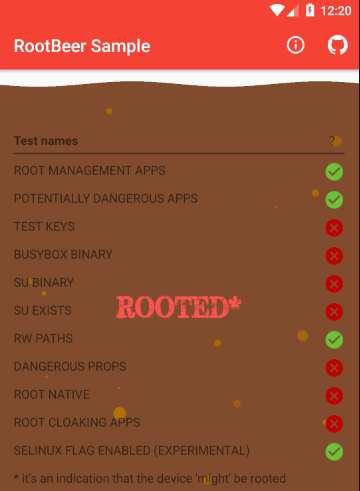
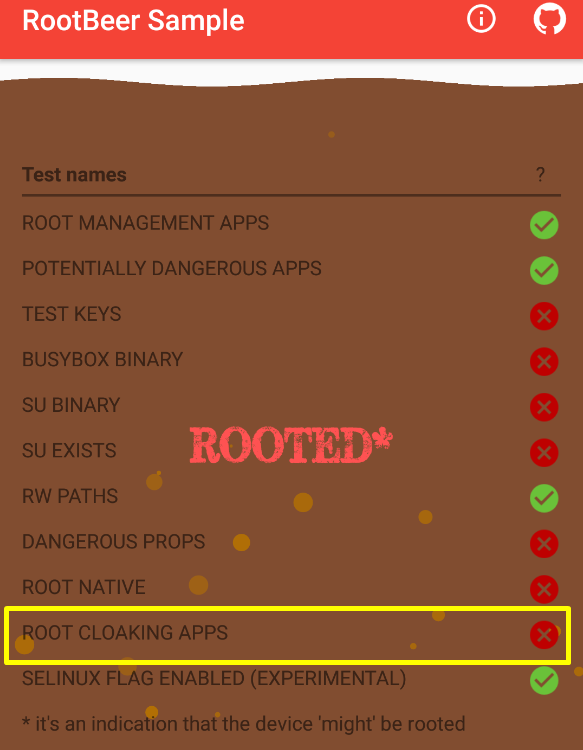
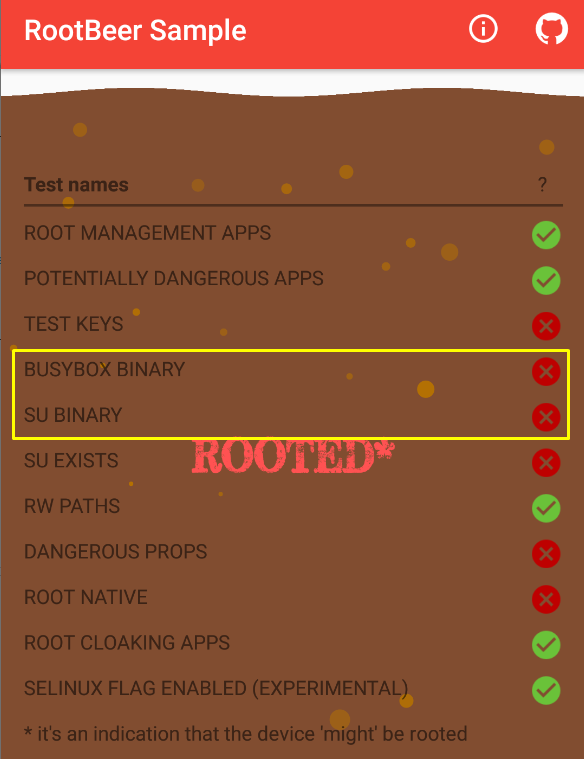
For example, some applications and directories containing threats have been detected on the virtual device I installed on Genymotion.
- A green tick represents that it is not on the device.
- The red cross represents it’s on the device.
Static Analysis
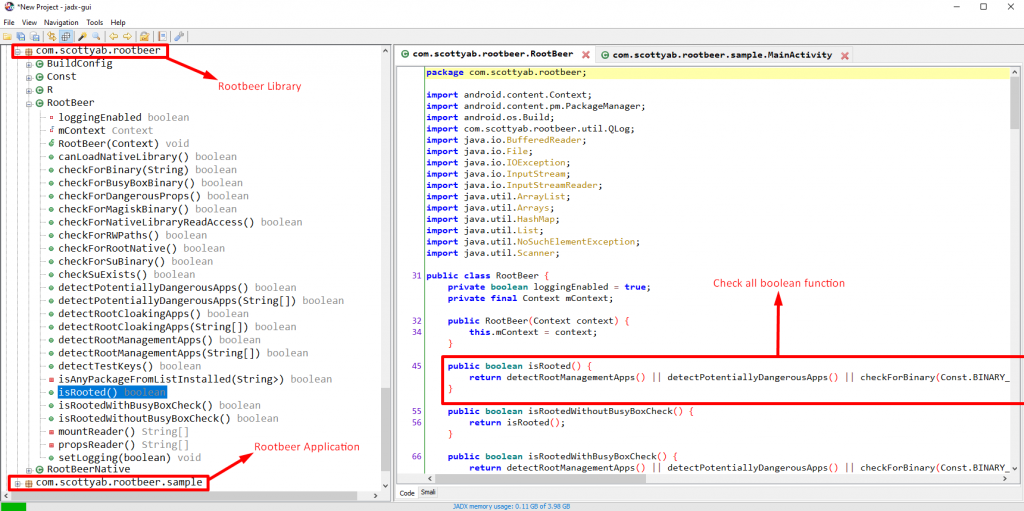
com.scottyab.rootbeer is the part where root detection is done. If we analyze the Rootbeer class, it has many boolean functions and they include different root detection methods.
Let’s analyze the detectRootCloakingApps function. The following function detect the values in the list named knownRootCloakingPackages.
public boolean detectRootCloakingApps(String[] strArr) {
    ArrayList arrayList = new ArrayList(Arrays.asList(Const.knownRootCloakingPackages));
    if (strArr != null && strArr.length > 0) {
        arrayList.addAll(Arrays.asList(strArr));
    }
    return isAnyPackageFromListInstalled(arrayList);
}
The list of knownRootCloakingPackages is given below. When you analyze the list, there are packages of an application called rootcloak that allows you to hide the root status of your Android device. If you have noticed in Figure-1, Root Cloacking APPS was detected.
public static final String[] knownRootCloakingPackages = {"com.devadvance.rootcloak", "com.devadvance.rootcloakplus", "de.robv.android.xposed.installer", "com.saurik.substrate", "com.zachspong.temprootremovejb", "com.amphoras.hidemyroot", "com.amphoras.hidemyrootadfree", "com.formyhm.hiderootPremium", "com.formyhm.hideroot"};
With the getPackageManager() method in the function named isAnyPackageFromListInstalled, it is checked whether these applications are installed on the device. If it is loaded, the value true is defined to the variable z and boolean funtion returns true.
private boolean isAnyPackageFromListInstalled(List<String> list) {
    PackageManager packageManager = this.mContext.getPackageManager();
    boolean z = false;
    for (String next : list) {
        try {
            packageManager.getPackageInfo(next, 0);
            QLog.e((Object) next + " ROOT management app detected!");
            z = true;
        } catch (PackageManager.NameNotFoundException unused) {
        }
    }
    return z;
}
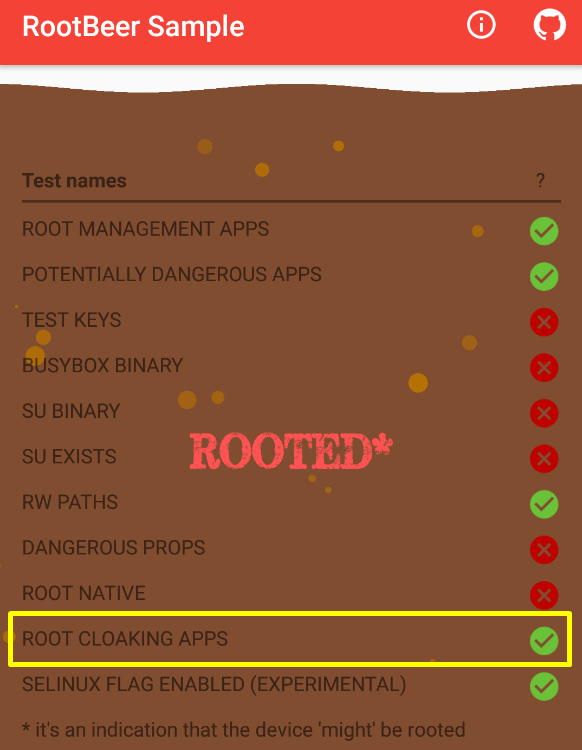
If isAnyPackageFromListInstalled returned false in boolean function, “ROOT CLOAKING APPS” would be marked as green tick in the application. Well, if we make changes on the related class in smali format, can we bypass it?
Yes, we can!
Decompile, Modify Smali and Recompile
In this article, I will not change all boolean values on sample app. I’m going to bypass control over just one function by telling you the logic.
Let’s decompile application!
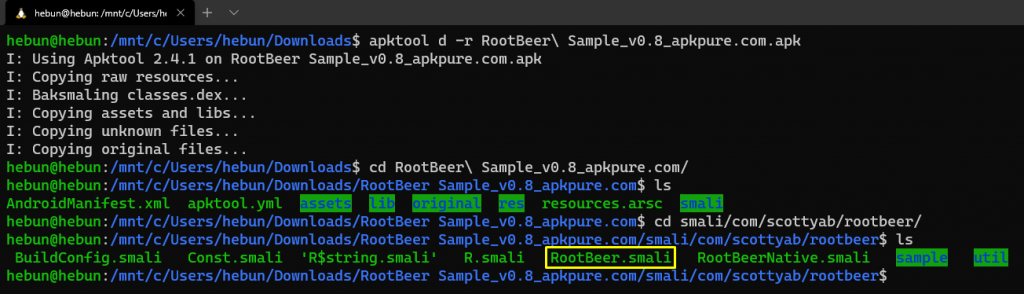
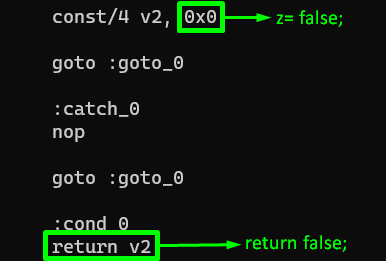
Detect the isAnyPackageFromListInstalled() function in the smali class that we will modify. Then, since the return value in the last part of the related method takes from z, let’s change the variable z from true (0x1) to false (0x0).
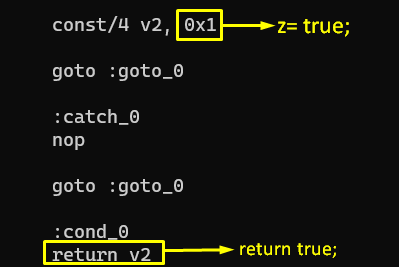
After doing the modification, let’s recompile the application again.
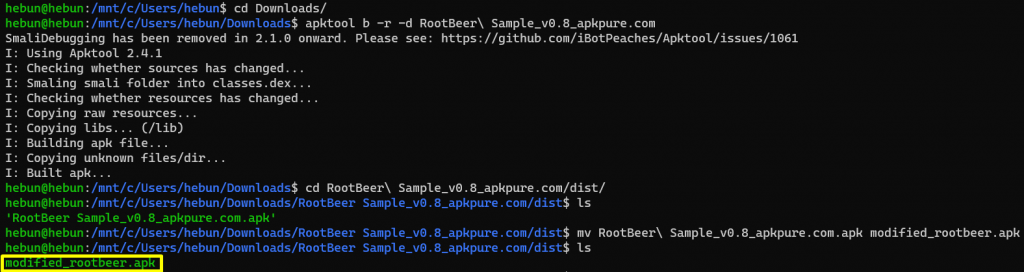
After creating the required certificate, sign the application. You can review these processes in previous article. Install it on your device and start root detection.
Appendix: Bypass with Frida
Modifying the application can cause problems in the application and may crash. In such cases, we must dynamically make changes in the application. I mean, we will hook over the class and function detected when the application runs and assign different values to the relevant variables. In this process, the toolkit named Frida will be used.
So what functions can be used when doing dynamic analysis with Frida?
Inject your own scripts into black box processes. Hook any function, spy on crypto APIs or trace private application code, no source code needed. Edit, hit save, and instantly see the results. All without compilation steps or program restarts
Frida
And many features… The link below contains information about the installation of the Frida toolkit;
Dynamic instrumentation toolkit
After applying the installation steps in the README.md section, it is time to install frida-server. You must have frida-server on your android device or emulator. Thus, you will be able to control all operations on the device from your computer.
There are two different frida-servers. One of them is for x86 architecture and the other is for ARM architecture. Download frida-server according to the processor suitable for your device.
After the setup process is complete, let’s set a target function. For example, I’ll anaylze through the function called checkForBinary().
public boolean checkForSuBinary() {
    return checkForBinary(Const.BINARY_SU);
}

public boolean checkForBusyBoxBinary() {
    return checkForBinary(Const.BINARY_BUSYBOX);
}

public boolean checkForBinary(String str) {
    boolean z = false;
    for (String str2 : Const.getPaths()) {
        String str3 = str2 + str;
        if (new File(str2, str).exists()) {
            QLog.v(str3 + " binary detected!");
            z = true;
        }
    }
    return z;
}
checkForBinary() checks two different boolean functions;
- checkForSuBinary for “
su” command - checkForBusyBoxBinary for “
busybox” command
Designed to pass “super user” privileges, the su command is available on rooted devices. It is an application that enables busybox UNIX commands to be run, which allows to use many commands such as mv, umount, dd etc.
These two boolean functions will take the value returned from the checkForBinary() function. These commands are available in AVD. Therefore, the variable z will be defined as true, so the related functions will return true.
Now Frida will step in. With the JavaScript code to be prepared, we will connect to the application via frida-server and we will hook and manipulate the function which we want.
console.log("Script Loaded");
Java.perform(function x() {
console.log("Inside java perform function");
var my_class = Java.use("com.scottyab.rootbeer.RootBeer");
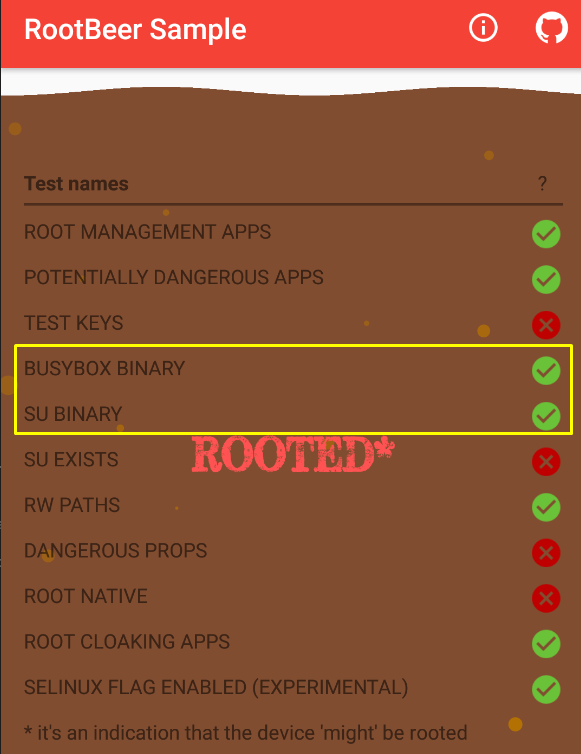
my_class.checkForBinary.implementation = function() {
return false;
}
});I specify the class with the boolean function to hook in Java.use. I change return validation in the checkForBinary() function to false (normally true).
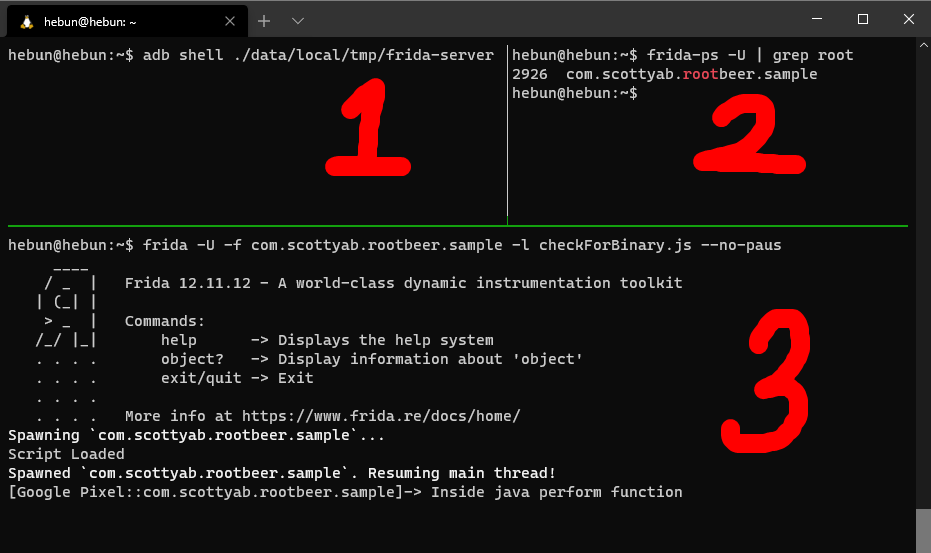
- Use adb to connect the computer to the frida-server on the android device.
- After opening the application, I detect the target package in the running processes.
- Then I run(-f) the target application on the device connected to my computer(-U) and load(-l) the script which I prepared.
Now is the time to bypass the entire root detection mechanism…
In the screenshot which I added at the beginning of the article, I showed that the function named isRooted checks all root detection boolean functions.
Let’s make a change to script and change the implementation to isRooted.
console.log("Script Loaded");
Java.perform(function x() {
        console.log("Inside java perform function");
        var my_class = Java.use("com.scottyab.rootbeer.RootBeer");
        my_class.isRooted.implementation = function() {
                return false;
        }
});
We succeed!
Conclusion
During the static analysis, we saw that root detection is detected from the directory, command or package name by some Java methods. If we come across a different root detection library, what we should search for these keywords using tools such as jadx-gui and trace the link between classes and functions. Then change the related functions in smali format or hook them with frida.
Did I have to rediscover America? Of course not, but I am solving my lack of knowledge on this subject by researching and practicing. And it satisfies me to write what I’ve learned here 🙂
I hope it was a useful article. Remember!
Knowledge increases with sharing…
References
https://medium.com/secarmalabs/bypassing-androids-rootbeer-library-part-1-a5f93918660d
Elvin Gentiles
https://medium.com/secarmalabs/bypassing-androids-rootbeer-library-part-2-30beb0676c0b
Elvin Gentiles